Connect to Cloud
The first section of the OpenBiotech getting started workflow involves connecting to and provisioning the cloud. OpenBiotech leverages Microsoft Azure for this. By curating the most advanced cloud services and deploying resources into an Azure subscription, OpenBiotech ensures that you’re not locked into a limited cloud setup but can scale and extend your cloud ecosystem without constraint.
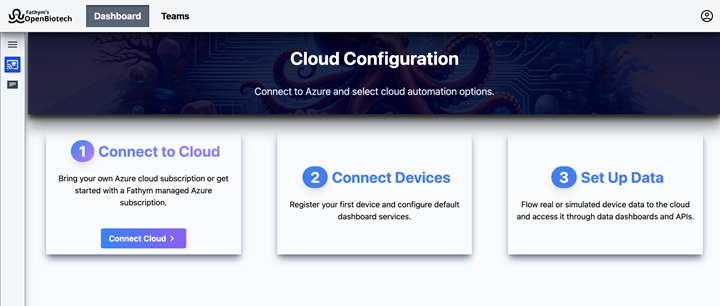
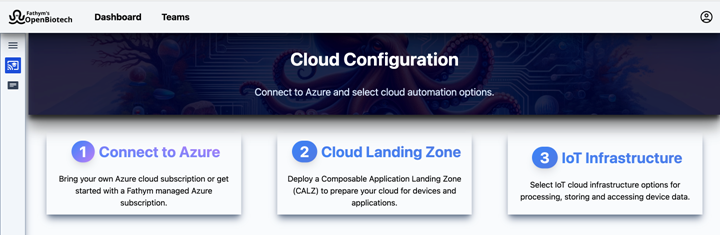
Within the cloud section of the getting started workflow are the following three steps:
- Connect to Azure
- Cloud Landing Zone
- IoT Infrastructure
1.) Connect to Azure
To connect to the cloud there are two options.
- Bring your own Azure subscription
- Create an Azure subscription that is managed by Fathym OpenBiotech
Selecting which option is best for you depends on whether you want to have full access and ownership of your own cloud subscription and resources or whether you would prefer OpenBiotech to handle everything in an Azure subscription managed under Fathym OpenBiotech’s Azure tenant. For the first option, you directly pay cloud costs to Azure, and for the second option Fathym bills you for Azure cloud costs.
OpenBiotech will connect to the existing or new Azure subscription and set up a service principal for that subscription so that it can configure and provision cloud services and resource groups on your behalf.
To do this you need to install and use the Fathym Command-line Interface (CLI).
Install Fathym CLI
Open a new terminal in your IDE of choice (for example, VS Code) and install node.js if it isn’t already.
To install the Fathym CLI, run the command:
npm install @fathym/cli@latest -g
To connect your Fathym account to the CLI, run the following command:
fathym auth
This will open your browser and prompt you to sign in to Fathym's OpenBiotech.
Create Cloud Connection
To create a cloud connection run the command:
npx fathym eac env clouds azure generate
This command kickstarts the process, first installing the Azure CLI.
Next, you will be prompted to ‘Use an existing subscription’ or ‘Create new managed subscription’.
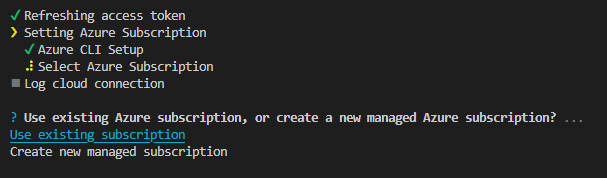
If you select ‘use existing subscription’ the CLI prompts you to log in to Azure (opening a browser login window). If you do not already have an Azure account, you can sign up instead.
If you select the ‘use existing subscription option’, once authentication is complete the CLI will list out all your Azure subscriptions and you must select one. If you're new to Azure, a subscription called ‘Pay-As-You-Go’ is automatically created by Azure.
Once you select an existing or create a new subscription, Fathym will set up a service principal and generate values for the following variables: Name, Description, Tenant ID, Subscription ID, Application ID, Application Auth Key.
Returning to the OpenBiotech Getting Started workflow, you can now copy those values into this form.
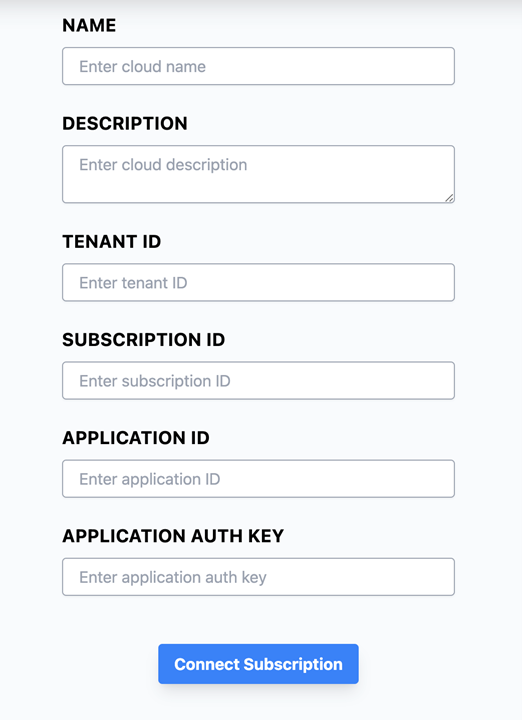
To finalize cloud connection, click Connect Subscription.
2.) Cloud Landing Zone
The second step of the cloud workflow configures a ‘Composable Application Landing Zone’ to prepare the newly connected Azure subscription for devices and applications. This is a configuration of Azure resources that will be deployed after the next step of the cloud setup workflow.
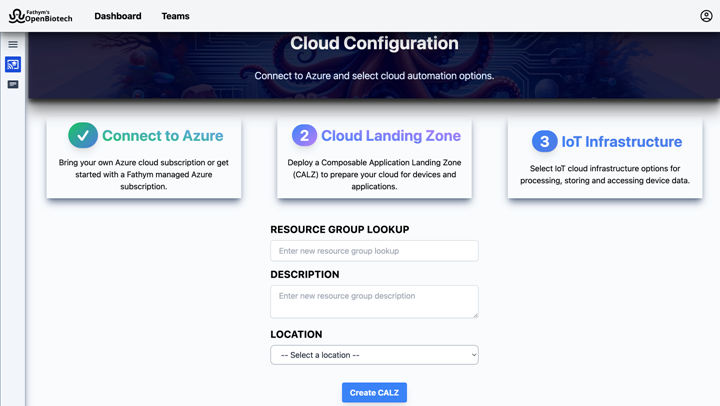
To complete this section, enter a unique Resource Group Lookup and an accompanying Description.
For the Location dropdown, select a preferred Azure region for provisioning resources. For information on selecting a region that best fits your needs, consult this Azure doc.
When ready, click Create CALZ.
3.) IoT Infrastructure
The final step of the cloud setup workflow is to establish an IoT cloud infrastructure that configures device data storage and access flows.
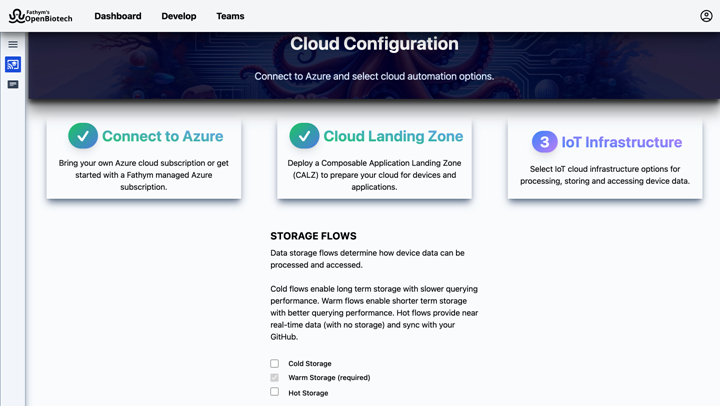
There are three data flows, one is required and two are optional. Each flow is best suited for different use cases and involves different data processing costs.
Cold (optional): The cold flow allows for long term storage with slower querying performance – ideal for AI/ML and deep analytics.
Warm (required): The warm flow allows for shorter term storage with better querying performance, routing data into a time-series window for analytics, alerts and dashboards.
Hot (optional): The hot flow provides data immediately, with no data storage, into applications such as real-time dashboards. When you select this option OpenBiotech integrates with GitHub and sets up a repository in your preferred organization.
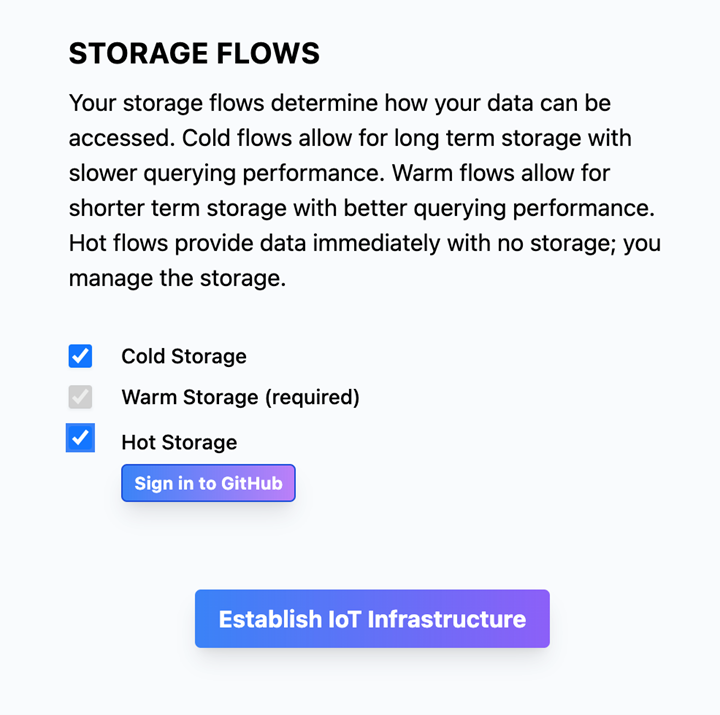
Select the check boxes for the cold and hot flows if you wish to include these options. If you select the hot storage option, you will be prompted to sign into GitHub (If you do not yet have GitHub, sign up here.)
To enable OpenBiotech to configure GitHub on your behalf, you will be prompted to install the GitHub app Open Biotech Web Manager. You will then be able to select one of your GitHub organizations.
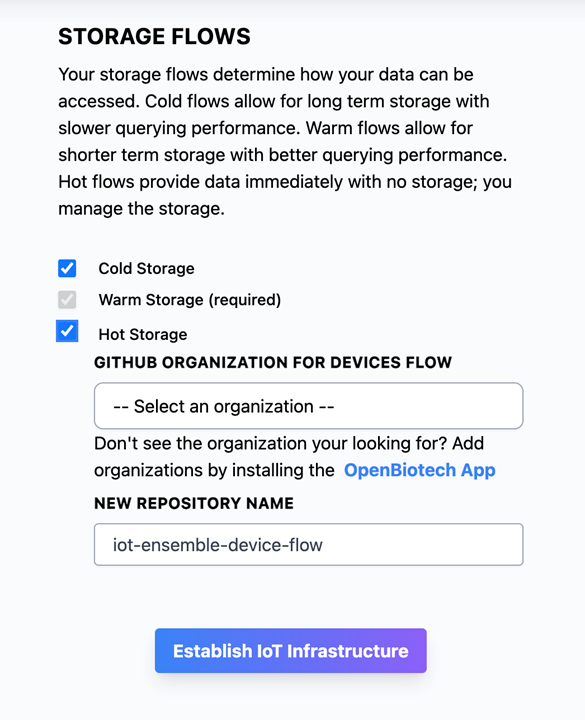
OpenBiotech will then set up a GitHub repository (default name ‘iot-ensemble-device-flow') in that organization.
To complete the step and provision the infrastructure, click Establish IoT Infrastructure.
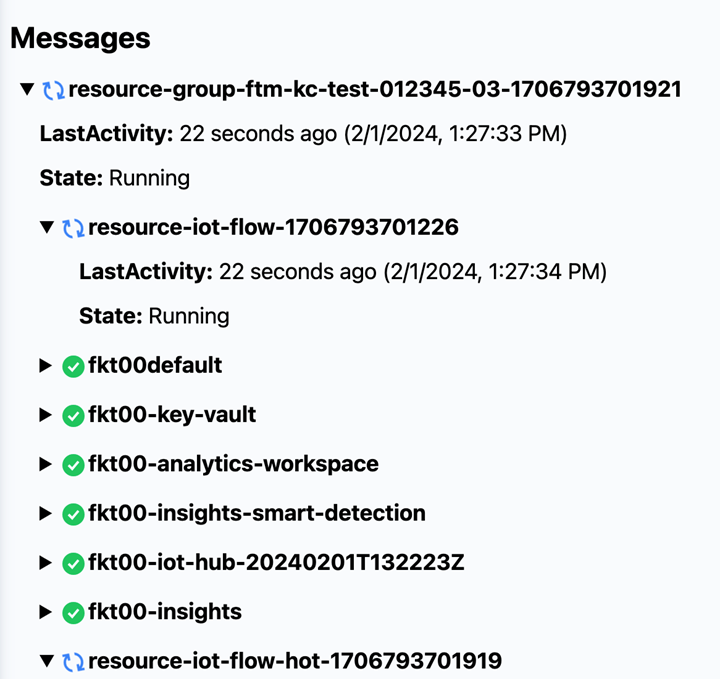
OpenBiotech now automates the deployment of Azure services and resource groups that were defined in the last three steps. This process will take approximately 15-20 minutes.