Set Up Data
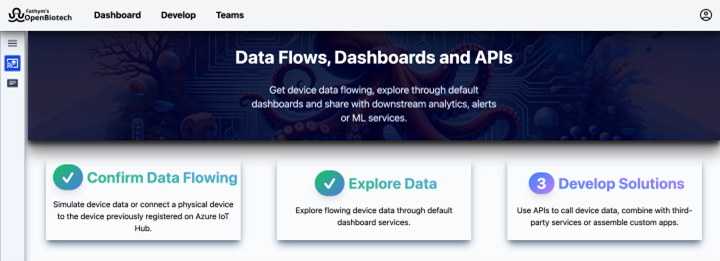
The third section of the OpenBiotech getting started workflow is to start flowing and exploring device data in the cloud.
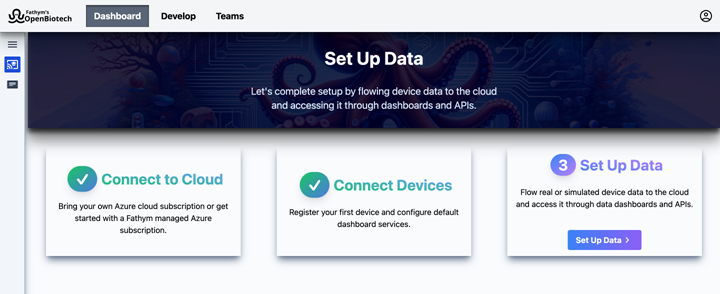
Within the data section of the getting started workflow are the following three steps:
- Confirm Data Flowing
- Explore Data
- Develop Solutions
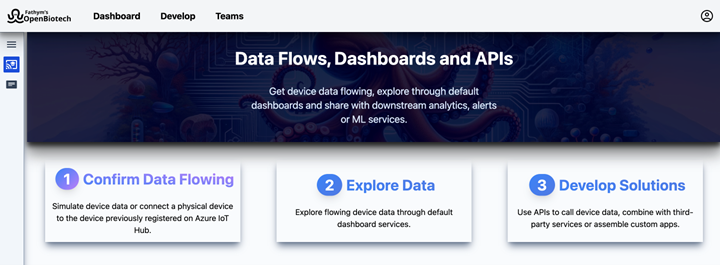
1.) Confirm Data Flowing
In this step you must start flowing data to the cloud, whether real or simulated. This is so the system can start working with data.
This step uses IoT Hub values generated previously in the Devices section.
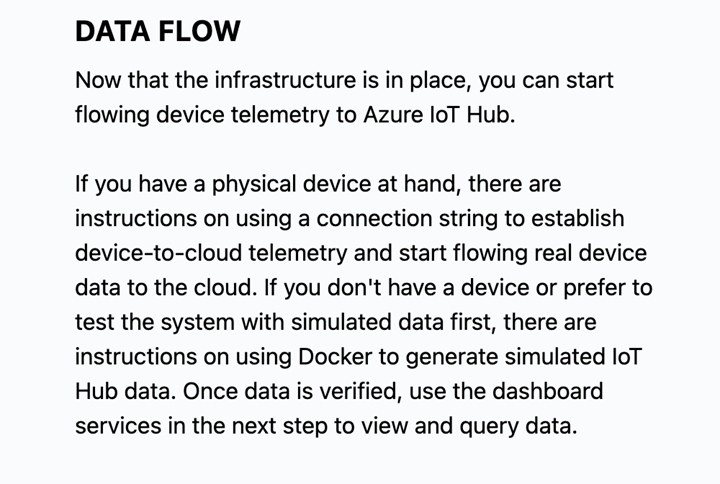
There are two pathways in this step.
- Flow physical device data
- Flow simulated device data
If you have a physical device at hand, there are instructions on using a connection string to establish device-to-cloud telemetry and start flowing real device data to the cloud. If you don’t have a device or prefer to test the system with simulated data first, there are instructions on using Docker to generate simulated IoT Hub data.
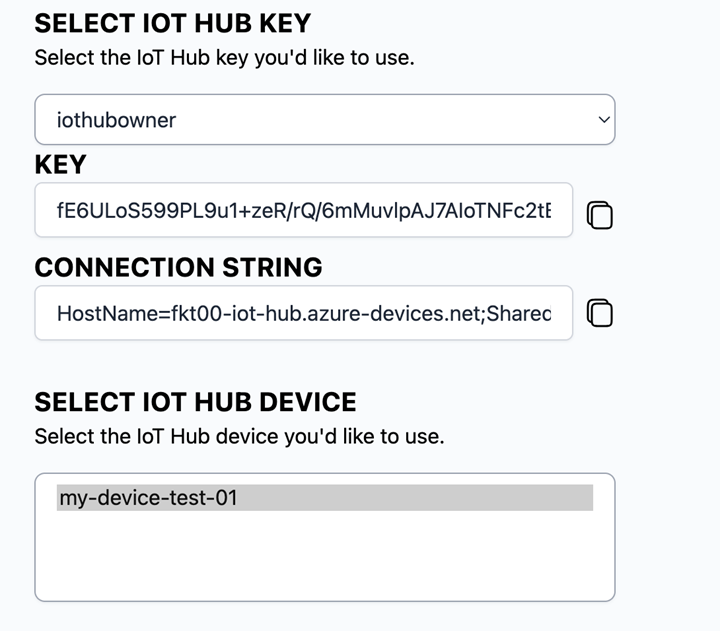
To get started, first select the IoT Hub Key you would like to use. These keys are shared access policies that define access control and permissions to IoT Hub.
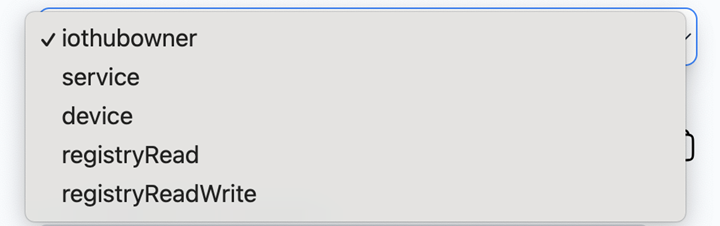
We suggest proceeding with iothubowner, as it is the policy with all permissions. You can learn more about the permission levels for each IoT Hub Key in these Azure docs.
For each IoT Hub Key role a different Key and Connection String are generated.
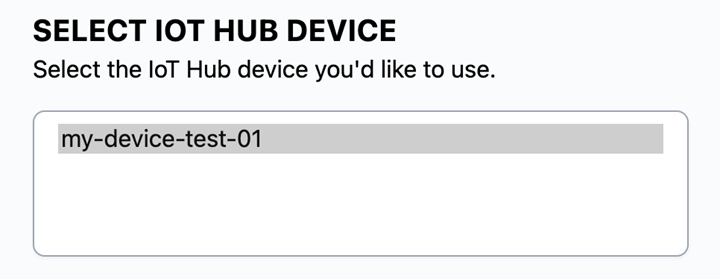
Next, select the IoT Hub device. You will see the device name you saved in the Devices section.
Physical device data:
To connect a physical device to IoT Hub, a Device Connection String is provided.
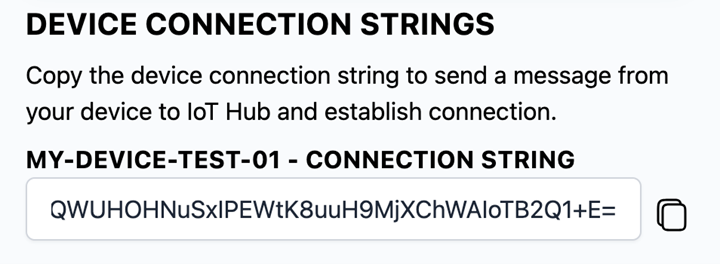
This Device Connection String consists of the Hostname, Device ID that was just selected and a Shared Access Key. This Connection String is ready to be used on physical devices. Adding a connection string to a device is a different process for different devices. As an example, you can reference the Cyton tutorial.
Simulated device data:
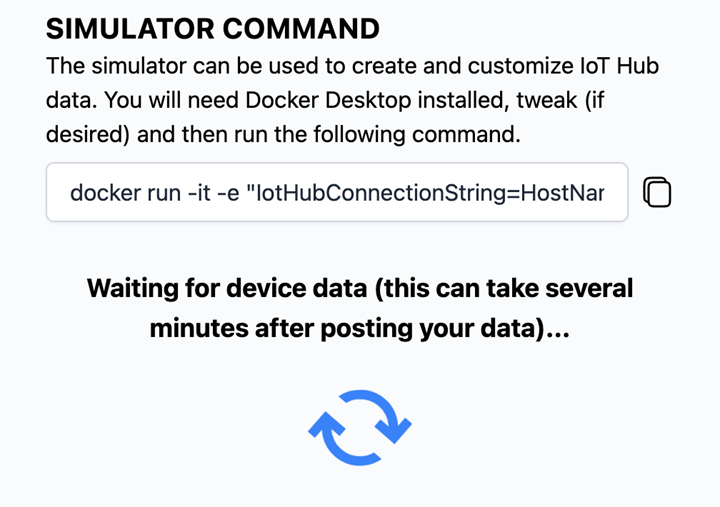
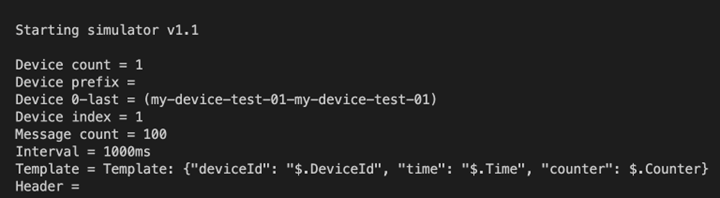
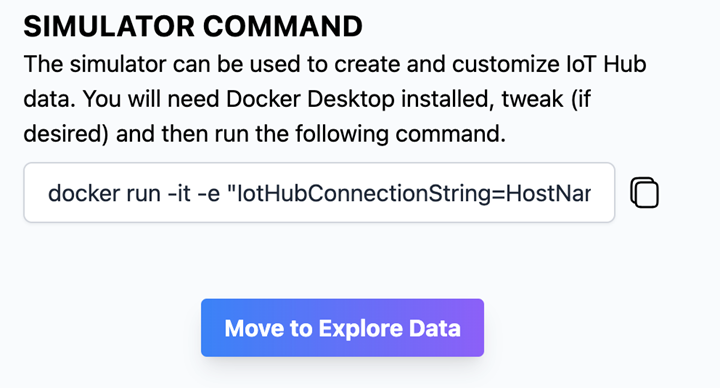
To flow simulated data to IoT Hub, first install Docker on your computer if you haven’t already. Make sure Docker Desktop is running.
Copy the provided Docker command and, returning to the Fathym CLI, run the command in your terminal. Data should soon start populating your terminal.
It can take a couple of minutes for that data to be confirmed in OpenBiotech.
When the system has confirmed that simulated device data is flowing to IoT Hub, click Move to Explore Data.
2.) Explore Data
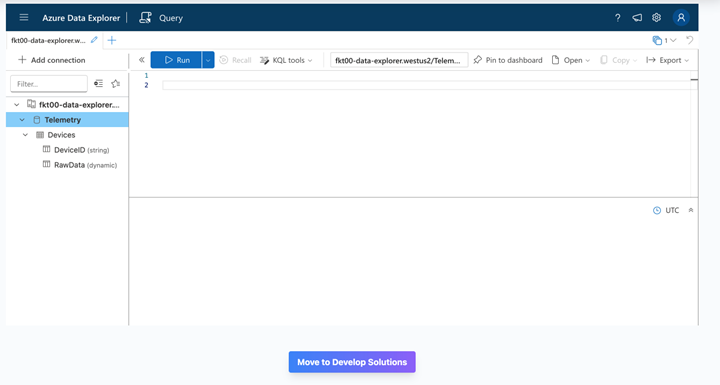
Now that data is flowing into the system, this step provides initial access to the data dashboard services that were configured earlier in the workflow – Azure Data Explorer and Freeboard.
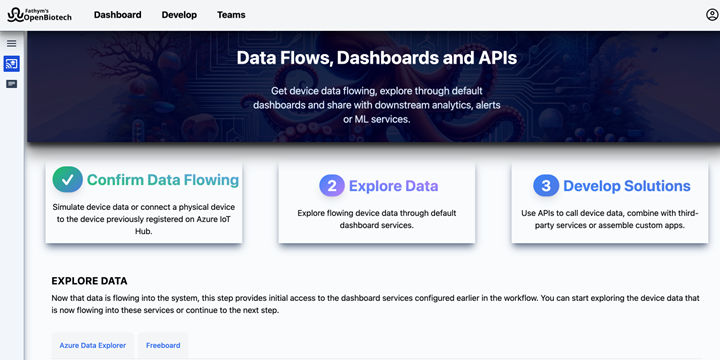
You can start exploring the device data that is now flowing into these services or continue to the next step. You will also have access to these services once this workflow is complete.
3.) Develop Solutions
Finally, this step provides API access so you can connect and send data downstream to any third-party system or assemble and deploy custom applications powered by device data.
The provided API URL and ACCESS TOKEN enable you to call the warm data API that was configured earlier. You will also have access to these API values once this workflow is complete.
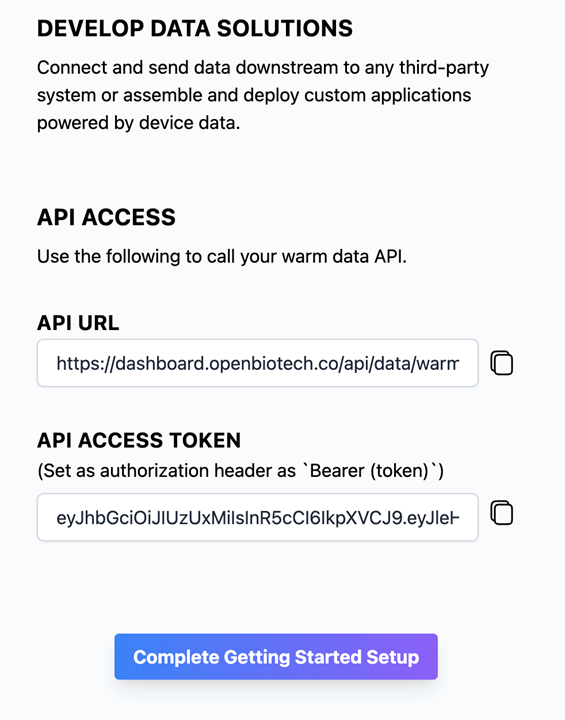
Use the format ‘Bearer (token)’ when incorporating the API Access Token as an authorization header in third-party services (such as Power BI).
When ready, click Complete Getting Started Setup to finish the workflow and move on to the main dashboards.